
Coming out as trans, nonbinary, or gender-expansive is hard enough at first. Everybody deadnames you, nobody seems to think using the wrong pronouns is a big deal, and in general people are loath to take the 35 seconds it mentally takes to make a note of your new name and identity. And on top of that there’s, you know, the fact that everyone is trying to extinguish us right now.
And don’t get me started on the legal name change process. Oy!
But there is one way you can avoid being deadnamed without sending out a mass email to everyone saying “hi, here’s my new email address even though you’ll probably keep using the old one anyway.” And if you’re a writer, editor, or any kind of person whose job revolves around communicating via email, this one trick can make a world of difference.
In Gmail, there’s a handy thing called an alias that you can use to keep your old inbox but send communications using a brand new email address. How, you might ask? I’ll walk you through it:
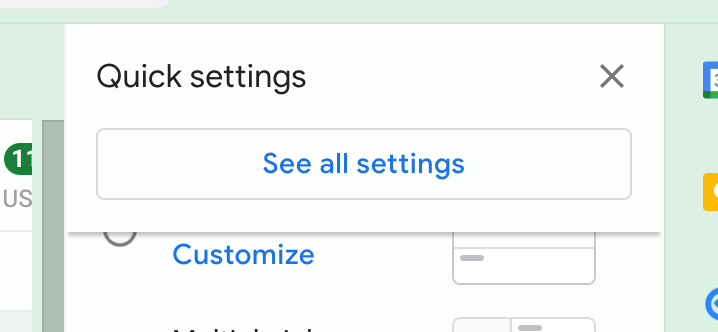
Step 1: Go to the Gmail “Settings” tab
This is the gear-shaped icon next to your photo, located on the right-hand side.
Step 2: Select “See All Settings”
This is at the very top of the menu.
Step 3: Go to the “Accounts and Import” Tab
Fourth from the left.
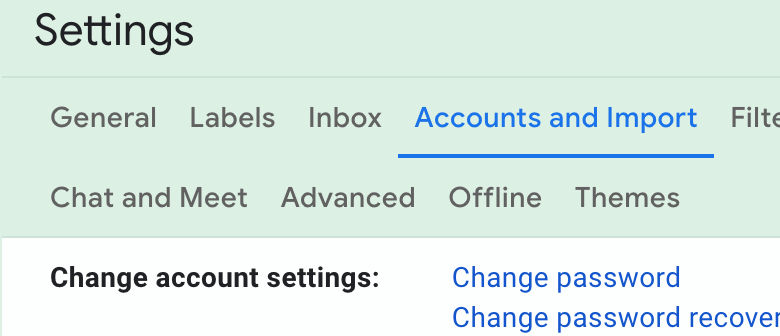
Step 4: Scroll down to “Send mail as”
4 down from the menu.
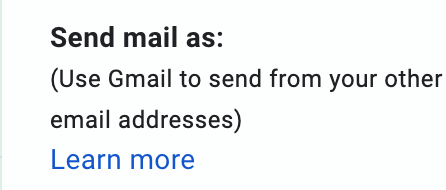
Step 5: Click “add another email address”
If you haven’t already created a new email with your real name, do that now. It takes three seconds!
You’ll now see a pop-up appear asking you to put in your name and your second gmail address:
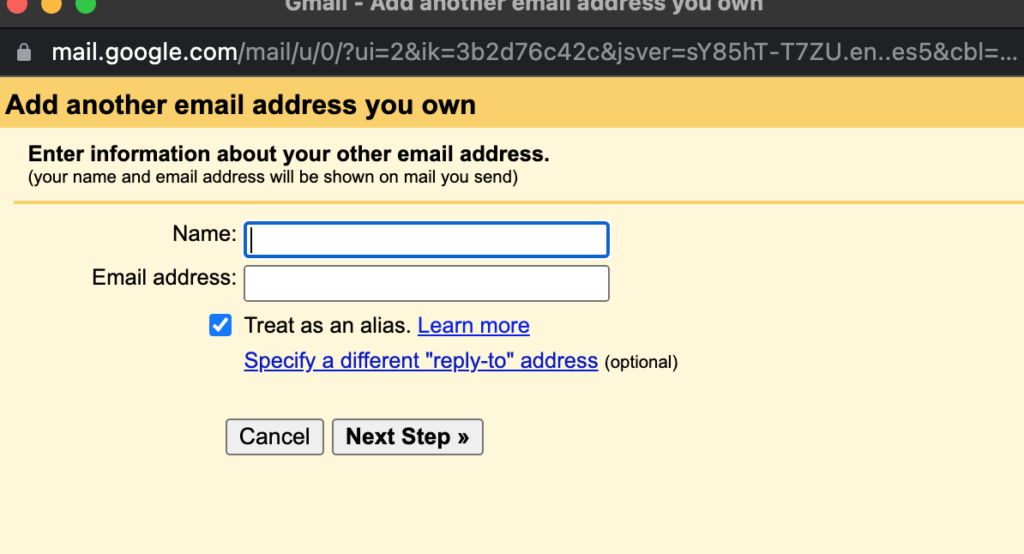
After you write in your name and new email, be sure to click the box “Treat as an alias.” This will allow you to send emails from your current (deadname) account as your new account bearing the correct name.
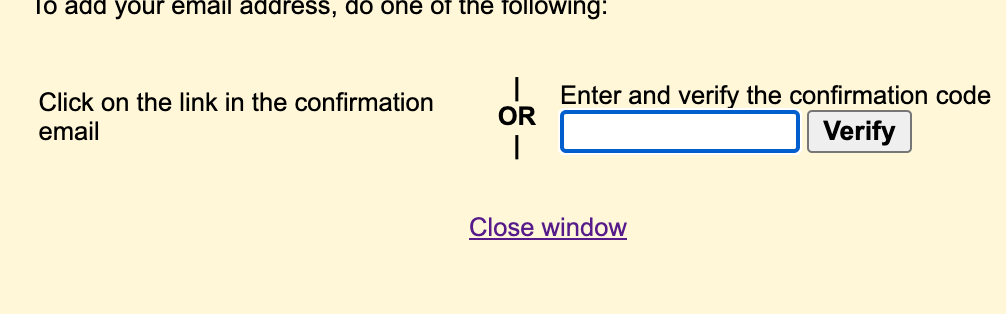
After entering in your new email, they’ll ask you to verify it. Go to your new email account and enter the code in the pop-up and click “verify.”
Step 6: Go back to “Settings>Accounts and Import”
Now you’ll see your new email entered below your old one. From here, you can change the settings to make the new email your default (which will keep your contacts but send out new emails with your correct name and address) and you can also choose to reply to all new emails as your account without any disruption or confusion on the part of the sender. Best of all, you won’t be triggered every time you open your goddamn email!

Step 7: Enjoy!
It’s not a perfect fix, but it sure beats having to make a new email account and start from scratch after a name change. In time, you’ll be able to phase your old email out, especially if you choose to make your email the “default” setting.
Now go out and send some emails!
Help make sure LGBTQ+ stories are being told...
We can't rely on mainstream media to tell our stories. That's why we don't lock our articles behind a paywall. Will you support our mission with a contribution today?
Cancel anytime · Proudly LGBTQ+ owned and operated
Read More in Culture


The Latest on INTO


Subscribe to get a twice-weekly dose of queer news, updates, and insights from the INTO team.
in Your Inbox